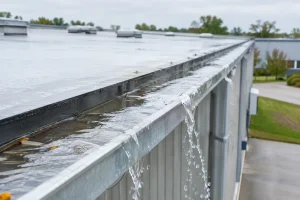




A commercial roof can look sound from the ground while water is already tracking beneath a failed penetration, parapet detail or plant plinth. To inspect roof flashings properly, the inspection must go beyond checking whether sealant is present. The real question is whether each flashing detail is still shedding water, accommodating movement and maintaining continuity with the roof waterproofing system.
Flashings are where roof systems change direction, meet another material or work around an interruption. They are also where poor design, rushed workmanship and neglected maintenance become expensive. For asset managers and facility teams, a flashing inspection is not a cosmetic exercise. It is a direct test of water-tightness, contractor accountability and future capital risk.
Why commercial roof flashings fail first
The field area of a roof is often straightforward. Flashings are not. They must deal with vertical surfaces, fixings, joints, thermal movement, wind pressure, drainage paths and interfaces between different materials. A small defect at one of these transitions can allow water into insulation, ceiling spaces, wall cavities or occupied areas long before a visible internal leak appears.
Common failure mechanisms include ageing sealants, corroded metal, cracked membranes at sharp changes in plane, loose terminations, inadequate upturn heights and incompatible materials. On older sites, multiple repair campaigns can create another problem: layers of patching that conceal the original defect without restoring the detail’s intended performance.
Australian conditions accelerate this process. High UV exposure hardens sealants and membranes. Intense rainfall tests drainage and lap details. Thermal cycling moves metal roofing, plant supports and parapet structures at different rates. Coastal environments introduce corrosion risk. A flashing detail that appeared acceptable at practical completion may be under real stress within a few seasons.
How to inspect roof flashings with commercial rigour
An effective inspection starts with evidence, not assumptions. Review available roof plans, previous condition reports, leak records, warranty documents, maintenance histories and recent contractor scopes before accessing the roof. Repeated reports of a ceiling leak in the same area may indicate a local flashing failure, but they can also point to water migrating from a distant high point.
Roof access must be planned safely and carried out by competent personnel. Fragile roof sheeting, unprotected edges, restricted plant zones and contaminated surfaces can turn a simple inspection into a safety incident. No inspection finding is worth bypassing access controls.
Once on the roof, inspect flashings systematically by roof zone and detail type. Record the location, construction, observed condition, likely consequence and recommended action. Good photos matter, but photos without orientation, measurements and a clear explanation do not give a client much control over the decision that follows.
Start at penetrations and plant interfaces
Services penetrations are among the highest-risk details on a commercial roof. Check pipes, ducts, cable trays, supports, exhausts, air-conditioning units, roof hatches and skylights. Each interface should have a formed, continuous weathering detail that directs water back onto the roof surface.
Look for split boots, lifting laps, open corners, unsupported membrane, exposed fixings, cracked sealant and signs that an installation has been added after the roof was completed. A penetration made for a new cable or service can compromise a roof system if the trade has treated waterproofing as someone else’s problem.
Plant plinths deserve particular scrutiny. The flashing must be high enough, secure at its termination and compatible with movement in the equipment and roof structure. Water staining, rust bleed, pooled water and deteriorated sealant can indicate a problem, but absence of staining is not proof that the detail is sound.
Check wall abutments, parapets and terminations
At parapet walls and vertical abutments, the roof membrane or sheeting must turn up the wall to a sufficient height and terminate securely. Counter-flashings, cappings and reglets need to prevent water entering behind the primary waterproofing layer.
Inspect for loose or missing fasteners, open laps, failed sealant joints, corroded cappings and terminations that have pulled away from the substrate. Pay close attention to corners. Corners concentrate stress and are frequently cut, folded or patched poorly during installation.
A termination bar covered with sealant is not automatically a compliant or durable solution. It may be appropriate in a particular system, but only when the substrate, fastener spacing, sealant condition and manufacturer’s requirements support it. The detail has to work as an assembly, not simply look finished from two metres away.
Follow the water path around transitions
Flashings must be assessed in the direction water travels. Inspect transitions between roof planes, changes in roof material, box gutters, valley gutters, expansion joints and discharge points. Check whether laps face the correct direction, whether water can pond against a vertical face and whether drainage is being blocked by poorly placed fixings, debris or previous repairs.
On metal roofs, examine apron flashings, barge flashings, ridge cappings and side laps for corrosion, movement and inadequate cover. On membrane roofs, inspect seams, membrane upturns, reinforced corners and edge restraints. Different materials require different inspection criteria, but the governing principle remains the same: water must be directed out, not given a path behind the roof system.
Distinguish surface ageing from active failure
Not every cracked bead of sealant requires an urgent replacement programme. Equally, not every neat-looking repair is reliable. The decision depends on the detail’s role, the material condition, exposure, building use and the consequence of water entry.
For example, isolated sealant deterioration at an accessible, sheltered non-critical junction may be suitable for planned maintenance. Widespread cracking around numerous penetrations, lifting membrane at terminations or corrosion beneath cappings suggests a systemic issue. That may require a broader remediation scope, design review or capital works planning rather than another reactive patch.
The cost of doing too little is obvious. The cost of doing too much is also real. Replacing a functioning roof system because of a small number of repairable flashing defects wastes capital. The inspection should establish the evidence needed to choose the proportionate response.
What a useful flashing report should tell you
A roof report should not leave the reader guessing which defects matter. It should identify each material defect, its location, likely cause, risk rating, recommended rectification and priority. Where possible, it should distinguish immediate water-ingress risks from defects that can be managed through planned maintenance.
For larger portfolios, the report should also identify recurring defect patterns. Are service contractors repeatedly penetrating roofs without approved details? Are the same flashing failures occurring across similar buildings? Has a recent roof replacement introduced poor workmanship at roof-to-wall interfaces? These are management issues, not just roofing issues.
An independent assessment has particular value where a contractor recommends extensive repairs or replacement. Contractors can provide valuable practical input, but their commercial position is clear: they sell work. Independent inspection gives the asset owner evidence to test the scope, challenge unsupported allowances and procure rectification on defined requirements.
Roof Inspection Australia does not sell repairs or roofing products. That separation matters when the decision involves a disputed defect, a warranty claim, a handover inspection or a major capital recommendation. The objective is not to create work. It is to establish what is actually happening on the roof and what response is justified.
Turning findings into controlled action
Once flashing defects are identified, avoid issuing a vague instruction to “repair all roof leaks”. That approach invites inconsistent pricing and superficial fixes. Define the defect locations, required materials, preparation standards, compatible detailing, testing requirements and photographic close-out evidence.
For complex or high-consequence buildings, consider observing critical rectification works. The most common failure point is not the quotation. It is execution at the roof interface, where access is difficult, sequencing is rushed and variations are often accepted without technical review.
Keep a record of completed repairs against the roof asset register. Over time, this makes it easier to identify whether the building has isolated maintenance needs or a repeating design and workmanship problem. It also gives facility teams defensible evidence when explaining expenditure to owners, boards, tenants or procurement teams.
A flashing defect is rarely dramatic at the start. It is a lifted edge, an open lap, a corroded fold or a service penetration nobody documented. Find it while the remedy is still controlled, specified and affordable.