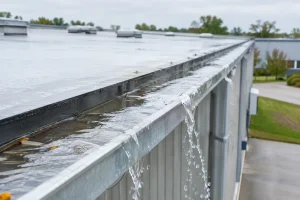




A ceiling stain is not a diagnosis. Nor is a photograph of a puddle, taken days after rain, proof that the roof is at fault. Knowing how to document water ingress properly gives asset managers evidence they can act on: evidence that identifies risk, supports contractor accountability and prevents money being spent on the wrong repair.
For commercial assets, the objective is not simply to record that water entered the building. It is to establish what happened, where it happened, when it happened, the likely pathway, the affected building elements and the level of operational exposure. That distinction matters when warranty claims, defects disputes, insurance notifications or capital works decisions are on the table.
How to document water ingress before the evidence disappears
Water ingress is time-sensitive. A wet ceiling tile may dry. A ponded area may evaporate. A contractor may complete a temporary patch before anyone has recorded the original condition. Start a formal incident record as soon as the issue is reported, and preserve the condition before remedial work changes the evidence.
Record the date and time the ingress was observed, the person who observed it, the precise location and the immediate impact. Avoid vague descriptions such as “leak in warehouse”. Use a location that someone unfamiliar with the site can find: Building 2, gridline C/14, southern tenancy boundary, beneath the box gutter penetration. Include the level, room or tenancy, and the nearest fixed reference point.
The event conditions also matter. Note whether water was observed during rainfall, immediately after rainfall, during wind-driven rain, following a storm, or under clear conditions. This does not prove causation, but it helps separate a roof or façade issue from plumbing, condensate, fire services or another internal source.
Where safe and permitted, obtain local weather information for the period in question, including rainfall intensity, wind direction and duration. A minor defect may remain dry in light rain but admit significant water when wind drives rain against a parapet, wall flashing or louvre. The weather record provides context. It is not a substitute for inspection.
Build an evidence record, not a photo collection
Photographs are essential, but an unlabelled gallery of images has limited value in a dispute. Every image should tell the reader what they are looking at, where it was taken and why it matters.
Take wide, medium and close images of the internal manifestation. Start with the broader area to establish location, then show the ceiling, wall, penetration, joint or fixture where water is visible. Include a scale where practical, such as a measuring tape or ruler. Photograph staining, dripping, damaged insulation, swollen linings, mould growth, corroded components and any damage to stock, equipment or finishes.
Then document the roof-level or external condition separately. The internal wet spot and the roof defect may not sit directly above one another. Water can travel along purlins, deck profiles, ceiling voids, services, insulation or wall cavities before it becomes visible. Do not draw a straight line from stain to roof and call it a finding.
A defensible evidence record should include at least these five components:
- a site plan, roof plan or annotated aerial image showing the ingress location and inspection points;
- dated photographs with captions, direction of view and unique image references;
- observations of internal damage and roof-level conditions, separated from assumptions about cause;
- weather conditions and the timeline of reports, attendance and temporary works; and
- records of prior repairs, known defects, maintenance history, warranties and contractor correspondence.
Name image files consistently. A useful format might include the site, date, location and sequence number. More importantly, use the same reference in the written report and marked-up plan. If Image RIA-023 shows an open lap at a roof penetration, the reader should be able to find that location without guesswork.
Separate facts, likely causes and required actions
This is where many water ingress reports fail. They move from observation to blame without establishing the pathway. A strong report separates three things: what was observed, what is likely causing it, and what should happen next.
For example, an observation may be: “Active dripping was observed from the suspended ceiling at gridline C/14 during rainfall. Moisture staining extended approximately 1.2 metres along the ceiling tile joints.” The likely cause may be: “The pattern is consistent with water tracking from the adjacent roof penetration, where failed sealant and incomplete flashing laps were observed.” The required action may be: “Undertake controlled investigation and rectification of the penetration flashing, then conduct a targeted water test before reinstatement of internal finishes.”
This language is deliberate. It avoids presenting an untested theory as fact, while still giving the client a clear decision path. If access constraints, weather conditions or concealed construction prevent confirmation, say so. Uncertainty that is clearly identified is commercially useful. False certainty is expensive.
Inspect the whole water pathway
The defect that admits water is often only one part of the failure. Documentation should follow the pathway from the catchment area through drainage, roof coverings, flashings, penetrations, interfaces and the building interior.
On commercial roofs, particular attention should be given to drainage capacity and discharge points, ponding around outlets, failed seams or laps, penetrations, plant plinths, rooflights, parapet flashings, movement joints, gutters and transitions between roof systems. Water entry can also occur at façade interfaces, above doors, around windows and through service penetrations that sit beyond the nominal roof area.
Record contributing conditions as well as the visible defect. Blocked outlets, inadequate falls, poorly detailed overflows, incompatible repairs and foot traffic damage can turn a small waterproofing weakness into a recurring operational problem. A patch may stop the immediate drip without addressing why water is repeatedly loading the same area.
This is also where an independent inspection has value. The party proposing the repair should not be the only party defining the cause, scope and success criteria. A contractor-led diagnosis can be correct, but it should be tested against the evidence, particularly where the proposed works are extensive or the defect sits within a warranty period.
Use testing carefully
Controlled water testing can help confirm a suspected pathway, but it can also produce misleading results if it is poorly planned. Testing should replicate the relevant exposure as closely as possible, start at the lowest likely entry point and progress methodically. Flooding an entire roof with a hose may introduce water into details that would not fail under normal rain conditions.
Document the test setup, water source, start and finish times, areas tested, personnel present and internal observations. Video can be useful where active ingress occurs during the test, provided it is supported by a written record. Thermal imaging and moisture meters may assist in identifying damp areas, but neither should be treated as conclusive proof of the ingress source without corroborating evidence.
Testing has trade-offs. It may require isolation of electrical risks, protection of sensitive operations and access to occupied areas. In healthcare, education, data, food production or live industrial environments, the investigation method must be planned around operational continuity rather than convenience.
Protect the evidence chain during rectification
Temporary works are often necessary. Water may be affecting electrical systems, stock, clinical areas, production lines or public access. Stop the immediate risk, but record the pre-repair condition first wherever possible.
If emergency repairs proceed before an independent inspection, require the contractor to provide before, during and after photographs, a marked-up description of the work, materials used and the exact extent of removal or replacement. Keep samples of failed materials where relevant. A section of deteriorated membrane, failed sealant or corroded flashing can be valuable evidence if a defect claim later becomes contested.
Do not accept “leak repaired” as a close-out statement. Require a defined repair scope, verification method and post-repair inspection record. The real question is whether the water pathway has been eliminated, not whether the ceiling stopped dripping for one dry week.
Turn the incident into an asset decision
One ingress event may be isolated. Repeated events in different locations usually point to a broader asset issue: ageing waterproofing, design shortcomings, drainage failure, poor workmanship or a maintenance regime that is reacting too late.
Keep a register that tracks each event by date, location, suspected source, repair history, cost, downtime and outstanding action. Patterns become visible quickly when evidence is organised. That register can support maintenance prioritisation, capital planning, warranty recovery and more disciplined contractor management.
Roof Inspection Australia’s role in this process is not to sell a repair. It is to establish the facts, identify the risk and give asset owners a clear basis for action. When the next water event occurs, treat it as evidence to be preserved, not an inconvenience to be photographed and forgotten.